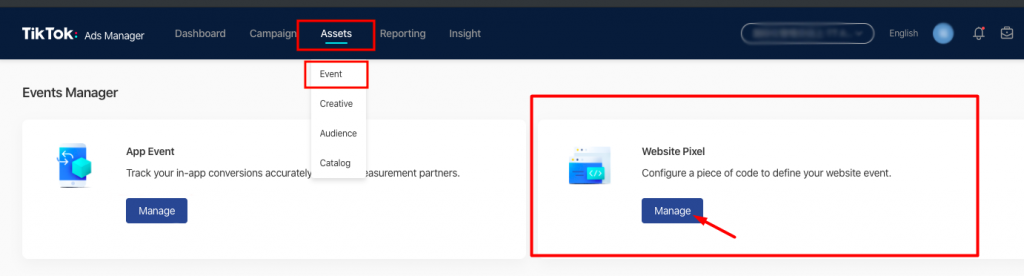
Click on “Assets” and select “Event” in the drop-down menu.
Step #3
Choose the “Website Pixel” box and click the “Manage” button.
Step #4
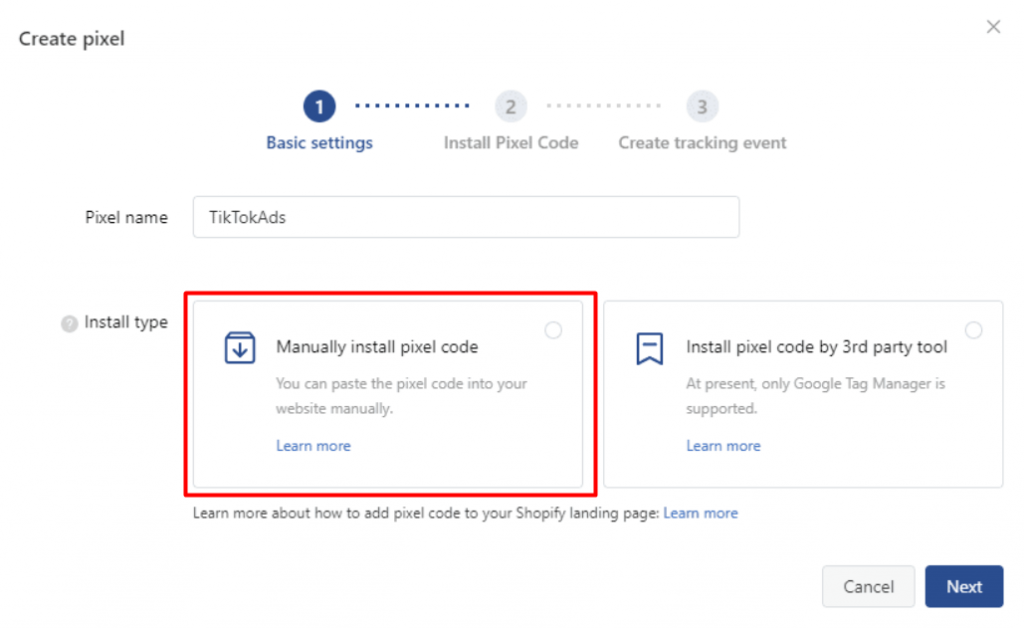
If you don’t have any Pixel, click “Create Pixel”. Add a name to your Pixel then select the Installation Type, in this case choose “Manually Install Pixel Code”.
Step #4
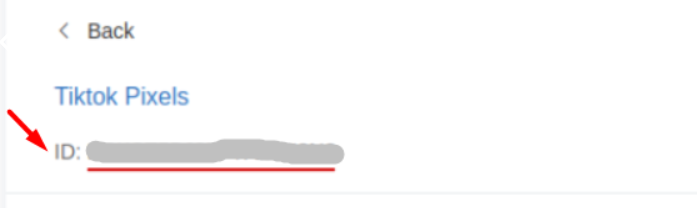
Complete the configuration of your Pixel and insert all the parameters you need for your activity. At the end of this procedure, you will be able to view your Pixel along with its ID.